Also, if you would like to have comments forwarded to your e-mail this is how you do it (if you have Blogger).
Step 1: Go to your Blogger home page and click the dropbox to the right of the blog you want to change the settings on. Select "Settings."
Step 2: Once on your settings page, click "Mobile and Email" on the left hand side.
Step 3: Here, under the "Comment Notification Email" type in the email you want comments sent to and click save. Now, you'll receive email notifications when you get new comments on any of your posts and this way you can send messages back to the person who left a comment (as long as they weren't 'anonymous').
I hope this helps anyone who has had this problem and makes it easier to navigate Blogger!
On to the jumbo pom pom fringe. One of the comments I got several times was about the fringe at the bottom of my wallhanging from Friday. If you missed Friday's post, click here, I participated in Madame Samm's "Shake Your Pom Poms" blog hop ... needless to say, it was a LOT of fun!
For this blog hop, one of the sponsors was Clover who wanted to promote their pom pom makers. When I first signed up for the blog hop I went to my local JoAnn's store and picked up both sizes they offer (there are 2 in each package, so I had a total of 4 pom pom makers), plus the yarn. At this point I still wasn't sure what the size of my finished project would be, so I wanted to make sure I had options! We always need options, don't we? :)
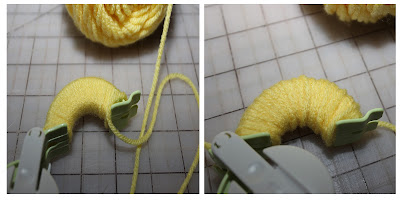
My first few pom poms didn't go so well, they were scrawny and weak ... nobody wants scrawny and weak pom poms! What to do?!? Well, the package directions show very clearly to carefully wrap a string of yarn around tightly to each other. With nothing to lose, I decided to make the pom pom by wrapping several pieces of yarn around tightly to each other (see first picture below) ... what a difference!! The pom pom was all of a sudden nice and full (see second picture below).
Then after you've cut the pieces that you just wrapped in half, tie your knot to hold the pom pom together and make sure you leave about a 6" handle on this piece, this is very important!
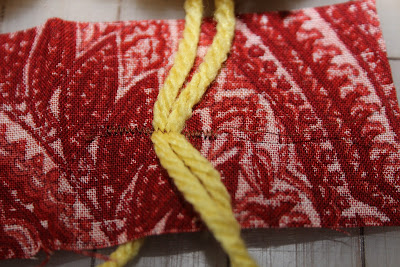
Next, cut a piece of 1" wide fabric by the length of your pom pom fringe. Lay your pom poms down as far away from one another as you want with your 6" handles laying over the backside of the fabric. Pin these in place and sew them down (I used a tight zig zag stitch to secure them down.)
Finally, cut the excess yarn off the top, iron down the fabric in half, and sew down with a straight stitch to create a finished look. Your pom pom fringe is ready! Enjoy!
Make sure to check out the projects for Day 4 of the "Shake Your Pom Poms" blog hop. Here's today's round up:
Have a great day!
Megan


No comments:
Post a Comment